I plant my spring bulbs in Colorado between mid-September and October when soil temperatures drop below 55°F at six inches deep. This timing lets the roots get established before winter so frost won’t kill the sprouting flowers around May 1–15.
Before I dig, I check my drainage by filling a hole with water and watching how fast it drains. If water sits there for a long time, I know I need to amend the soil or pick a different spot.
For spacing, I put large bulbs four to six inches apart and small ones one to three inches apart. I cluster at least fifteen large bulbs together so they have more visual impact when they bloom.
I arrange my bulbs by height, layering taller varieties toward the back and shorter ones in front. This way everything gets sunlight and nothing gets shaded out.
After planting, I apply three to four inches of mulch to regulate soil temperature through winter. This keeps the ground from freezing and thawing too many times, which can damage the bulbs.
Colorado’s Frost Dates: Why Timing Is Critical for Bulb Success
Colorado’s frost dates shift depending on where you live and how high up you are. I can’t just plant bulbs whenever I want. In Denver at 5,280 feet, the last spring frost hits around May 1–15 and the first fall frost shows up by early October. These dates set my planting schedule.
I need to get bulbs in the ground between late September and October when the soil temperature drops below 55°F at six inches deep. This timing lets the roots get established before winter. If I plant too early, the bulbs might start sprouting and then frost will kill them.
Getting the timing right means I’ll have that spring display I’m looking for. I’m working with Colorado’s climate, not against it.
The Best Planting Window: Mid-September Through October

When should you actually get those bulbs in the ground? I’m talking late September through October in Colorado. This is my sweet spot for planting success.
Here’s why this window matters. Soil temperatures need to drop below 55°F at 6 inches deep. This prevents bulbs from sprouting too early. I also need time for the bulbs to establish roots before the ground freezes solid. Those roots anchor during winter and strengthen my spring bloomers.
Late September works especially well in Denver’s climate. I start monitoring soil temperatures mid-September with a soil thermometer. Once I hit that 55°F mark, I’m ready to plant. I’m racing against the freeze, but I’ve got time. Getting bulbs in now means they’ll root deeply before winter arrives. This root formation is what creates a solid spring garden.
Get Your Garden Ready: Sunlight, Soil, and Drainage

Before you plant those bulbs, I need to assess your garden’s sunlight, soil drainage, and overall conditions. I’ll check how many hours of direct sun each spot gets. Most spring bulbs need at least 6 hours of direct sunlight daily to bloom well.
Next, I’ll test whether water drains well or pools after rain. I do this by digging a small hole about 12 inches deep and filling it with water. If the water drains within a few hours, your drainage is good. If it sits there, I know I need to improve it.
I’ll also figure out what amendments your soil needs. I might add compost, peat moss, or perlite to loosen up heavy clay soil or improve drainage. Adding 2 to 3 inches of compost mixed into the top 8 inches of soil usually does the trick. Getting these three things right now means your bulbs will perform well when spring arrives.
Sunlight Requirements For Bulbs
How much sun do my bulbs actually need? I’ve got to figure this out before I plant bulbs in Colorado. Most varieties do well with full sun exposure, which means at least six hours of direct sunlight each day during the growing season.
I’m looking at a few different situations. Full sun lovers need six or more hours to bloom with bright colors. If I have shadier spots in my garden, I can use partial shade tolerant varieties instead. The afternoon shade actually helps during Colorado’s intense heat when the bulbs are growing the most. South-facing locations give me consistent sunlight that brings color from early spring onward.
I want my bulbs positioned to catch morning and midday rays. The sun’s angle matters more than I might think. I need to scout my garden now and notice where light hits throughout the day. That’s where I’ll plant my bulbs for the best spring display.
Soil Drainage And Amendment
Now that I’ve figured out where the sun hits my garden, I need to tackle the soil itself. Colorado’s clay-heavy soils don’t drain well, which means our bulbs will rot if we don’t fix things. I’m amending my soil with sand, peat moss, and compost to improve drainage and moisture management.
| Amendment | Purpose | Application |
|---|---|---|
| Sand | Improves drainage | Mix into top 8 inches |
| Peat moss | Increases water retention | Blend with clay soil |
| Compost | Enriches soil structure | Add 2-3 inches before planting |
I’ll work these amendments into my garden bed before planting. Here’s how I’m doing it: I’ll mix sand into the top 8 inches of soil to help water drain faster. Then I’ll blend peat moss with the clay to help hold the right amount of moisture. Finally, I’ll add 2 to 3 inches of compost on top before I plant my bulbs.
Well-draining soil prevents rot and gives our bulbs the conditions they need to grow. This setup makes the difference between bulbs that thrive and ones that disappoint come spring.
Site Assessment Before Planting
Once I’ve amended my soil, I need to check whether my planting site actually works for bulbs. Before I dig, I’m looking at four things that matter for getting roots established during my planting window.
Sun exposure: I want beds that get at least half-day sun. Bulbs need this light to do well year-round.
Drainage verification: I’m checking that water doesn’t pool after rain. Pooling water causes root rot and frost problems.
Soil temperature monitoring: Starting mid-September, I use a soil thermometer at 6 inches deep. I’m aiming for soil that’s below 55°F, which tells me when to plant.
Frost risk assessment: I note my area’s typical frost dates. This helps me time planting so roots get established before the deep cold arrives.
Running through this site assessment turns my soil prep work into actual planting success.
How Deep and How Far Apart: Planting Depth and Spacing

Getting the depth and spacing right matters when I’m planting bulbs in Colorado. I generally plant bulbs two to three times deeper than their width. So a 2-inch bulb goes 4–6 inches deep. I always position the top facing upward where the shoots will come out.
For spacing, I place large bulbs 4–6 inches apart and smaller ones 1–3 inches apart. This clustering gives me that full, natural look I want. I check the bulb packaging for spring-flowering variety instructions since they’ll guide me on specifics.
Here’s what I’ve learned about Colorado soil. I dig deeper in sandy soil and shallower in clay soil because drainage works differently in each type. Getting these details right means my bulbs will do well through Colorado’s seasons.
Plant in Clusters and Layers for Maximum Spring Color

To create a big spring display, I plant my bulbs in clusters rather than scattering them one by one. Bold groupings will give you real color when those first blooms arrive in your Colorado garden.
Bold groupings of bulbs create real color impact when spring arrives in your Colorado garden.
Here’s what I do:
- Use at least 15 large bulbs or 35–50 small bulbs per cluster for maximum impact
- Space large bulbs 4–6 inches apart and small bulbs 1–3 inches apart so they fill in nicely
- Layer taller varieties toward the back with smaller ones like crocus facing front
- Add 3–4 inches of mulch after planting to keep soil temperature steady
I plant during late September through October when soil temperatures drop below 55°F at 6 inches deep. I water thoroughly right after planting. This clustering method makes my spring color really stand out across the landscape.
Mulch and Protect Your Bulbs Through Winter

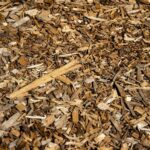
After you’ve planted your bulbs in those bold clusters and watered them in, mulch becomes your best friend for the cold months ahead. I apply 3–4 inches of mulch right over my planting beds. This layer regulates soil temperature and prevents the freeze-thaw cycles that can heave bulbs out of the ground. In Colorado’s harsh winters, that protection matters.
I use organic materials like shredded leaves or wood chips. They break down gradually, enriching my soil while keeping everything stable. The mulch also helps maintain consistent moisture, which supports root establishment through fall and into winter. Come spring, your bulbs will be safe and ready for their growth.
Spring Care for Colorado Bulbs: Watering, Feeding, and Foliage

When your bulbs start poking through the soil in spring, that’s when my real work begins. I’m entering the phase where my Colorado bulbs wake up and start blooming. Here’s what I need to focus on:
Watering
I water moderately as foliage emerges. I keep the soil consistently moist but not soggy, since my bulbs need well-draining soil. Colorado’s spring rains often give my bulbs enough water, so I avoid overwatering.
Feeding
Once green shoots appear, I apply light fertilization to support growth and flowering. A balanced bulb fertilizer like Espoma Bulb-tone works well. I follow the package directions for the amount to use based on my garden size.
Monitoring Foliage
I check my leaves regularly and remove any that look damaged. This prevents disease from spreading. My bulbs spent winter establishing roots underground at the proper planting depth. Now they’re pushing energy upward into leaves and flowers, and I’m just supporting that natural process.
Letting Foliage Die Back