I’ve found that the best materials under raised beds are hardware cloth to stop burrowing pests like voles and gophers. Cardboard works as a temporary weed barrier that breaks down in 4–6 months. I also layer leaves in 6-inch increments for organic filler that adds nutrients as it decomposes.
I skip plastic, fresh wood chips, and gravel because they trap water and restrict root growth. These materials keep moisture from draining properly and can suffocate plant roots over time.
After laying your base layer, fill the beds completely with quality soil and compost. I use a mix of about 60 percent compost and 40 percent topsoil for best results. Getting this foundation right makes a real difference in how well your plants grow.
Fill It Completely: The Most Reliable Foundation

How do you build a raised bed that’ll actually support your plants for years? I start by filling it completely with quality materials. I use a soil calculator to figure out exactly how much I need.
For the bottom, I layer hardware cloth and a weed barrier together. Hardware cloth keeps burrowing pests out while letting water drain through. I skip plastic and gravel because they trap water and block roots from going deep.
Cardboard works great as a temporary weed barrier too. It breaks down in 4-6 months and becomes part of the soil. Then I add nutrient-rich soil and compost from bottom to top. I make sure to use plastic-free, inert materials to keep my edible gardens safe from contamination.
This complete filling method lets your plants reach their full rooting depth. It gives your bed real longevity.
Hardware Cloth: Stop Burrowing Pests at the Source
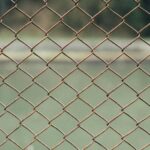
Now that your bed structure is ready, it’s time to deal with the real problem: burrowing pests underground. I install hardware cloth beneath raised beds to stop voles, gophers, and armadillos before they damage my crops. This barrier blocks their access while letting earthworms move through freely.
Here’s how I do it: I secure the hardware cloth with staples or washers and bolts before I add soil. Then I layer landscape fabric or X-Board floor protection on top for extra reinforcement. This setup keeps water draining through the soil while creating an effective pest barrier.
I’ve found that adding hardware cloth along with other weed-control measures protects my soil health. The barrier stops pests from damaging plants without hurting the soil’s organic matter. It’s a straightforward investment that improves garden security.
Cardboard: Temporary Weed Block That Breaks Down in 4–6 Months

Why spend money on pricey weed barrier cloth when cardboard works just as well for free? I’ve found that plain cardboard placed at the bottom of raised beds stops existing weeds and grass from growing while it breaks down into organic matter that feeds the soil.
I layer cardboard before adding soil and compost. This setup blocks weeds and helps the soil hold onto moisture longer. The cardboard decomposes in about 4 to 6 months, so I know it’s a temporary solution that I’ll need to replace.
| Feature | Benefit |
|---|---|
| Decomposition Timeline | 4–6 months |
| Cost | Free or minimal |
| Soil Improvement | Adds organic matter |
| Weed Suppression | Effective temporary barrier |
When I choose cardboard, I skip any boxes with glossy printing, paint, or tape on them. Those coatings can leave unwanted substances in my soil. Plain cardboard from grocery stores or appliance shops works well and costs nothing.
Since the cardboard breaks down over time, I plan to add a fresh layer every 4 to 6 months. This keeps the barrier working and steadily builds up the organic content in my beds. It’s a budget-friendly way to improve my soil while keeping weeds under control.
Leaves: Cheap Filler That Settles Unevenly

Got a pile of leaves sitting in your yard? I can use them as bottom filler for my raised beds instead of buying expensive materials. I’ll layer leaves in 6-inch increments, compress each layer, and wet it down. This method adds organic matter to my soil as the leaves break down over time.
Here’s the catch though. Leaves settle unevenly and break down slowly. After the leaves settle, I’ll fill the remaining 8–10 inches with topsoil and compost. I should expect some settling, so I’ll either top things off later or stick with annuals my first season while things stabilize.
The real payoff comes down the road. Once the leaves decompose, I can compost that material and use it for future raised beds. This creates nutrient-rich soil without spending much money, making leaves a solid choice for layering and building better soil over time.
What Not to Use: Plastic, Fresh Wood Chips, and Gravel

Just because something’s sitting around your yard doesn’t mean it belongs in your raised bed. Let me walk you through the materials I skip.
Just because something’s sitting around your yard doesn’t mean it belongs in your raised bed.
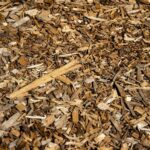
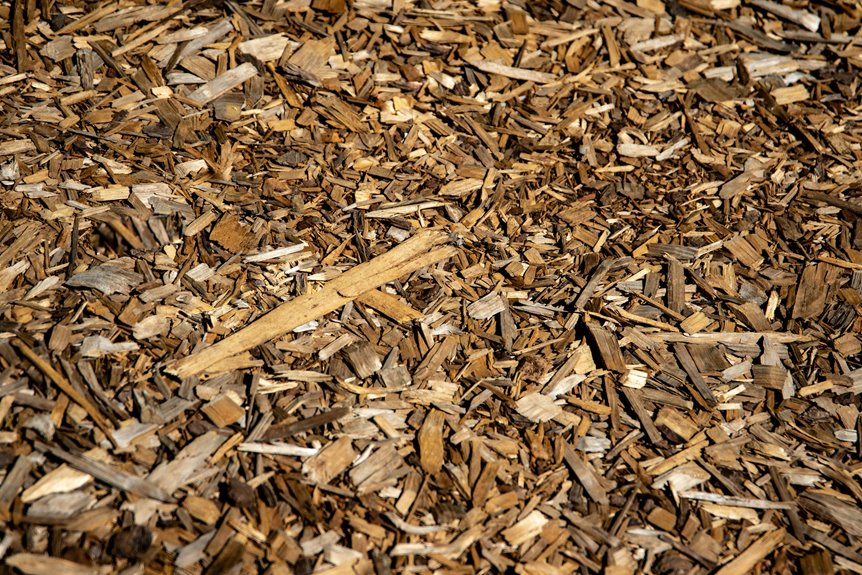
I avoid plastic bags, plastic bottles, and trash bags at the bottom of my beds. Fresh wood chips are a problem too. They pull nitrogen out of your soil, break down fast, and create dangerous heat buildup. Gravel might seem easy to use, but it blocks water from moving through properly and stops roots from growing deep.
Here’s what happens with these materials:
- Plastic stops water from moving down and traps moisture around your roots
- Fresh wood chips pull nitrogen from your soil and starve your plants
- Gravel creates drainage issues and keeps roots from spreading
If I do use wood chips, I skip pressure-treated varieties. The chemicals in them ruin your beds. I pick bottom fillers that work with my soil, not against it.