
Squash doesn’t technically need a trellis, but vining varieties really benefit from one. I find that trellising saves me a lot of space—I can fit two mature plants in a 4×4 foot area instead of letting them sprawl 3–4 feet per plant. When squash grows vertically, the leaves get better airflow, which prevents powdery mildew and rot from taking hold.
If you’re growing heavier winter squash varieties, you’ll need sturdy livestock panels anchored 5 feet deep into the ground. Bush varieties aren’t worth the effort of trellising, so I stick with vining types like spaghetti squash or butternut when I’m planning to go vertical.
One thing I’ve learned the hard way is that trellised plants dry out faster than ground-sprawling ones. You’ll need to water consistently to keep up with their needs. Keep reading to find out the exact steps for building your trellis and how to space your plants properly.
Should You Really Trellis Your Squash?

Why’d your squash vines sprawl all over the garden last year? We’ve all been there. Here’s the thing: squash are heavy feeders that grow fast and vigorously. Their vines get massive and topple over without support.
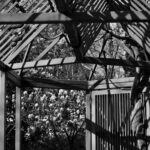
That’s where a trellis comes in. I use a sturdy frame that I anchor into the ground using t-posts or stakes. It’s basically a structure made of wood or metal that holds up climbing plants.
When I trellis my squash, I’m not just saving space. I’m growing vertically instead of letting vines sprawl horizontally across the ground. This vertical growth lets me create a 3D growing area, and I potentially double my usable space. I guide vines upward and train them onto the structure early on. I even prune occasionally to keep airflow moving through the leaves.
The practical side of this is that I get more plants in a smaller area. My garden stays organized, and the fruit sits up off the soil where it’s less likely to rot or get eaten by slugs. It’s practical gardening that works.
How Vertical Squash Cuts Your Footprint in Half

How much space am I actually wasting when squash vines sprawl across my garden?
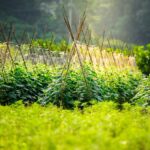
I’m losing tons of room. Ground vines need 3–4 feet just for one plant. A trellis flips that. I guide vines upward on a 7-foot tall structure. Now I fit two mature squash plants in that same 4×4 foot area. That’s my footprint cut in half.
| Setup Type | Ground Space Needed |
|---|---|
| Ground sprawl | 3–4 feet per plant |
| Vertical trellis | 2 feet per plant |
| Yield comparison | Similar or higher |
| Fruit position | Mid-air, safer |
I space plants about 3 feet apart on the trellis. Strong supports matter. Light and airflow reach every leaf. Fruit hangs safely above soil, so rot disappears. Harvesting takes minutes instead of searching through tangled vines.
Start With Rich Soil: Squash Will Devour It

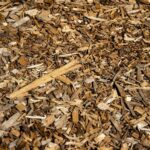
Squash plants are heavy feeders—they’ll use up your soil fast if you don’t prepare it right. I build my beds with compost, Re-Vita Pro (which has hen manure, feather meal, bone meal, sulfate of potash, leonardite, and kelp), and azomite minerals. These ingredients give squash roots the nutrients they need to thrive.
I aim for at least 6 inches of soil depth per plant, ideally across an 8 square foot area. This supports the sprawling root system that keeps the vines healthy. The soil needs to drain well so it doesn’t get waterlogged, which helps prevent disease and improves how many fruits develop.
During growing season, I add foliar feeds every two weeks to boost growth. Foliar feeds are nutrients sprayed on the leaves that get absorbed quickly. The time I spend building good soil pays off with strong plants and bigger yields.
Pick Vining Over Bush Squash

If I’m planning to trellis my squash, I need to pick vining varieties. These types grow long stems that naturally climb up structures like cattle panels or hoops. Bush varieties stay short and compact, so they won’t work well on a trellis and honestly aren’t worth trying to train upward.
Vining Varieties Ideal For Trellising
When I’m planning a trellis garden, I choose vining squash varieties instead of bush types. I grow Winter Luxury Pie Pumpkin, Spaghetti Squash, Tromboncino Rampicante, Butterscotch Butternut, Delicata, and Cha Cha Kabocha on my trellis. These varieties naturally produce long vines that climb and spread upward.
Trellising saves me garden space while boosting my yields per plant. The vertical setup maximizes light exposure and improves air circulation around my plants, which reduces disease pressure. I get more produce from the same amount of ground space.
For larger-fruited types, I need sturdier structures and fruit support like hammocks or bags. These prevent the heavy fruit from snapping the vines. I also prune excess shoots and secure vines to the trellis to prevent breakage under heavy fruit loads. This setup lets me grow more efficiently in my garden space.
Avoid Bush Squash Types
Why’d I skip the bush varieties when I decided to trellis my garden? Bush squash types just won’t cooperate with vertical structures. They produce compact plants that stand alone and don’t naturally climb. When I trellis squash, I need varieties that want to grow upward.
Vining varieties are what I’m after. They’ve got those long stems and tendrils that grab onto supports naturally. Winter Luxury Pie Pumpkin, Spaghetti Squash, and Tromboncino Rampicante are perfect examples. Butterscotch Butternut, Delicata, and Cha Cha Kabocha work great too.
Here’s the thing: bush types are sprawling and heavy. They’ll actually damage a trellis designed for climbing vines. I stick with vining squash when I want that vertical garden setup. The vining plants grow upward instead of spreading out across my garden bed, which saves me space and keeps my trellis intact.
Building a Trellis That Handles the Weight

I’ve learned that building a sturdy squash trellis really comes down to picking the right materials and setting up a structure that won’t buckle. You’ll want to use heavy-duty materials like livestock panels, cattle panels, or galvanized metal instead of flimsy wood or plastic that’ll sag when your squash gets heavy.
The foundation is where I focus my effort. I anchor my panels about a foot off the ground with 6-foot T-posts spaced roughly 5 feet apart. This keeps everything stable and prevents any shifting when the vines grow thick.
Material Selection and Durability
Squash vines get heavy fast, and their fruits pull down hard on whatever you build. I need materials that won’t bend or snap under that weight.
I use livestock panels—those galvanized metal grids that resist rust. They hold a lot of weight without breaking. Treated lumber works well too. The wood resists rot and stays strong for several years. Galvanized metal frames are another solid choice because they won’t corrode or weaken over time. I also secure everything with high-tension mesh or wire to keep panels from sagging.
I dig my 6-foot posts about 5 feet deep into the ground. This keeps everything anchored and stable. Cheap materials fail when those squash fruits get heavy. Spending money on durable stuff now means I won’t have to replace the whole structure later.
Structural Support Specifications
Once you pick materials that won’t fail, you need to build a structure strong enough to hold all that weight. I anchor livestock panels or cattle panels with 6-foot t-posts spaced 5 feet apart. This setup reaches about 7 feet tall, and I let the vines extend 1 to 2 feet above the top before they dangle down.
The key is securing the vines to the trellis using wire or zip ties about a foot off the ground. I can’t rely only on the plant’s natural tendrils to hold heavy fruits. At the base, I add chicken wire or reinforced panels for ground clearance and airflow.
To spread the weight evenly, I use multiple trellises or curved layouts instead of a single straight structure. This prevents any one spot from bearing too much load.
Planting Your Squash Three Feet Apart

I’m growing squash on a trellis, and I’ve found that spacing really matters. Here’s what I’m doing:
I plant my seeds about 3 feet apart from each other. I put three seeds in each spot to improve my chances of germination, which just means getting the seeds to sprout. Once the seedlings pop up, I thin them down to one strong plant per location. Each plant needs roughly 8 square feet of deep soil underneath it.
This spacing keeps my vines from crowding together as they climb upward. When plants are spaced out like this, air moves around the leaves and stems more easily. Better airflow cuts down on rot and disease problems. My trellis system works best when I don’t pack the plants too tight. Respecting these measurements sets me up for healthy growth.
Securing Vines Without Snapping Tender Growth

Getting your spacing right keeps plants healthy. Now I need to handle the vines as they grow up the trellis. I secure my squash early with soft ties or flagging tape. This gentle approach stops stress on the tender new growth.
My trellis setup matters a lot. I use sturdy livestock panels or reinforced wire that’s mounted firmly so there’s no wobble. A wobbly trellis can damage young shoots. As the vines develop, I train multiple stems onto the structure and prune back the extra growth. This opens up airflow around the plants.
When fruit starts to show up, I’m extra careful. I lift each squash and attach it using fruit hammocks or wider ties instead of thin materials that can cut into the stem. These wider supports stop the fruit from bending or tearing the delicate vine segments where it connects to the plant.
Why Trellised Squash Drink More Water Than Ground Plants?

When I grow squash on a trellis, the plants show way more leaf surface area to the sun and wind. This means they lose water faster through evaporation. Ground squash can send roots down their vines to grab extra moisture, but trellised plants can’t do that. Instead, they depend entirely on water from the main root system deep in the soil.
Because of this higher water loss and limited root expansion, I need to water my trellised squash more often and deeper. I water down at least 6 inches into the soil to keep moisture where the roots can actually reach it. The key is keeping that soil consistently moist throughout the growing season.
Increased Leaf Surface Area
Why do trellised squash plants seem to drink so much more water than their ground-growing cousins? The answer lies in their leaf structure. When I train squash vertically on trellises, I’m creating something pretty remarkable.
More leaves catch direct sunlight throughout the day. Vertical growth exposes my foliage to stronger air circulation. All this means I’ve got expanded canopy with greater surface area for water loss. That expanded leaf surface area transpires, or releases, way more water than ground vines do. The sun hits those leaves directly. The breeze moves around them constantly.
I’ve also got less soil shading, which lets roots dry faster. So I’m essentially building a bigger plant with more leaves working hard. The combination of direct sun exposure and constant air movement means my trellised squash loses water faster than plants spreading across soil. I’ve got to water deeper and more frequently to keep up with what these plants demand. I’m looking at watering every other day during hot weather, compared to maybe twice a week for ground-level squash.
Higher Evaporation Rates
Once I lift those vines up onto a trellis, I’ve changed how my squash plants lose water. Now I’m dealing with evaporation from two places instead of one. My leaves sit exposed to sun and wind up there, pulling moisture right out into the air. At the same time, that soil around my plants dries out faster since it’s not shaded by sprawling vines anymore.
I need to water deeper and more often to keep up with this. I’ll water 2–3 times per week when it’s hot or dry. I push that water down 6 inches deep to reach where the roots actually absorb it. This deeper, more frequent approach keeps my plants hydrated enough for steady fruiting without stressing them out.
Limited Root Expansion
When I trellis squash, I’m changing where the roots can actually grow. Here’s what happens:
The roots can’t travel along the vine anymore. Moisture won’t move down the stem to help like it does with ground plants. I need at least 8 square feet of deep soil per plant. The roots depend entirely on what’s in that soil zone.
Trellised squash can’t adapt the way sprawling plants do. They’re stuck relying on moisture I provide at the root zone. I can’t expect those vines to pull water from deeper down the stem like their cousins spreading across the ground. This means I’m responsible for consistent watering.
I water deeply and infrequently, at least 6 inches down into the soil. I’m managing their entire water supply through careful soil moisture instead of letting roots spread out naturally.
Why Spacing Vines Stops Powdery Mildew Cold

Powdery mildew loves crowded, damp spaces. I think of it as a fungus that thrives when plants are packed together. When I space my squash vines properly, I’m basically removing the conditions it needs to survive.
Powdery mildew thrives in crowded, damp spaces. Proper spacing removes the conditions it needs to survive.
Here’s what happens when I give my vines room to breathe. Air flows freely around the leaves instead of getting trapped. This air movement dries wet foliage fast after rain or watering. Mildew spores can’t survive on dry leaves, so I’m eliminating their breeding ground right there.
Dense canopies create humid pockets where mildew loves to settle in. Wider spacing opens up the plant to sunlight and breeze. I space my squash plants about 18 to 24 inches apart to allow for proper air circulation. I also use trellising to keep vines lifted and spread out horizontally rather than letting them tangle together on the ground.
The combination of good spacing and trellising creates an environment where powdery mildew can’t gain a foothold. Leaves dry faster between irrigation cycles. Sunlight reaches more of the plant. The result is a simple strategy that keeps my plants healthier.
Sling Heavy Fruit in Nylon Hammocks

When my squash vines start producing those hefty fruits, I notice they get pretty heavy pretty fast. I’ve found a simple solution that really works: nylon hammocks.
I use stretchy nylon stockings or specialized fruit-hanging nets. I tie them between trellis strands to support the developing fruit. I install these hammocks after fruit set but before the fruits become too heavy to lift. I position them so they catch the fruit as my vines grow upward.
I check my hammocks regularly for wear and replace any damaged nylon right away. These hammocks distribute the weight evenly under each fruit. They reduce pressure on the stems and prevent breakage. They also keep the fruit off the soil, which lowers the risk of rot.
This approach lets me grow squash vertically and protect my harvest at the same time. I maximize my trellis space while keeping my fruits safe from damage.
Fighting Powdery Mildew: Resistant Varieties and Airflow Fixes

Why does powdery mildew show up on my squash leaves even when I’m using a trellis? Trellising alone won’t stop this fungal problem. I need a two-part strategy that combines resistant varieties with better airflow.
I should choose squash varieties with built-in genetic resistance to powdery mildew. Not all cultivars handle the disease equally. Some varieties like ‘Delicata’ and ‘Butternut’ naturally resist infection better than others.
I also need to improve airflow around my vines. I space plants at least 3 to 4 feet apart instead of crowding them together. I prune off the lower leaves on each plant once it’s established. Better air circulation slows down mildew development noticeably.
I monitor my plants regularly, especially in late summer when cooler nights and warm days create ideal conditions for the disease. If mildew spots appear despite my efforts, I apply organic fungicides like sulfur powder or neem oil. I follow the label directions for application rates and timing. This combination of resistant varieties, proper spacing, pruning, and monitoring gives me the best chance at healthy plants.
Harvesting Trellised Squash Before Frost

As frost approaches, I need to harvest my trellised squash before the cold kills the vines and ruins the fruit. I’ll pick squash that’s reached full size and has the mature color for my variety. I’ll leave about 2 inches of stem on each one to prevent rot from developing.
After harvesting, I’ll cure the squash in a warm, dry room for a few weeks. This curing process helps harden the skin and prepares them for storage. Then I’ll store them at 55–60 degrees Fahrenheit to keep them fresh longer. I’ll watch for any disease that might spread between fruits while they’re in storage.
Timing Harvest Before Frost
- I monitor weather forecasts closely for frost warnings in my area
- I check my fruit for mature color and firm texture before picking
- I look for vine die-back or weather damage signs
- I harvest remaining fruits quickly when frost threatens
I want to pick my squash before cold damage occurs. Mature fruit stores better than underripe squash. I leave about 2 inches of stem on each one. This reduces rot during storage. Then I cure them in a warm, dry room for a few weeks. Finally, I store everything at 55–60°F for maximum shelf life.
Managing Late-Season Disease
Because frost and humidity team up to create disease problems, I need to stay on top of my harvest schedule in those final weeks before freezing temperatures hit. I cover pollinated fruits with bags to reduce pest access and protect them from sunscald damage, which is when the sun burns the skin and creates soft spots.
I check my trellised plants every few days. When I spot diseased fruit or vines, I remove them right away to stop disease from spreading to healthy parts. I also prune back some foliage to increase airflow around the trellis when humidity climbs. Better air circulation helps prevent mold and fungal issues that love damp conditions.
For butternut varieties, I harvest when the skin turns tan. That tan color signals the fruit has reached peak storage potential and will last longer in my storage area. This approach keeps my crop healthy right up until the first frost arrives.
Proper Curing And Storage
How you handle your squash after harvest really matters for storage life. I’ve grown mine on a trellis, so I’ve learned a few things about keeping them in good shape.
Here’s my process:
- I cure my squash in a warm, dry room for 2-3 weeks after picking it
- I leave about 2 inches of stem on each squash to stop rot from starting
- I use soft ties or fruit hammocks when harvesting from the trellis so I don’t bruise the skin
- I store the cured squash at 55-60°F to keep it fresh longer
I bag my harvested fruit right away to protect it while I carry it from the trellis to storage. This curing process takes a little time, but it turns your squash into produce that lasts for months in your pantry.
Winter vs. Summer Squash on Trellises

When I’m deciding whether to trellis my squash, I need to know that winter and summer varieties have pretty different needs. Summer squash spreads out with lighter vines that reach 3–5 feet, so I can use simpler trellising setups. Winter squash demands something sturdier because the fruits grow bigger and heavier. I’ll want to use livestock panels or heavy-duty netting to keep those dense fruits supported without sagging.
Both types benefit from trellising though. I get better air circulation around the plants, which cuts down on disease problems. Sunlight hits the fruit more evenly too, creating uniform development. When I space-plan my garden, winter squash lets me build taller, multi-tier structures. Summer squash works fine with shorter, flexible layouts. Trellising really does change how I grow squash vertically.
Squash Trellis Layouts: Single or Multiple Plants?

Should you plant one squash or two on your trellis? It depends on how much space I have and what I’m trying to grow.
For a single plant, I’d use a tall arched trellis or a panel trellis. One vine climbs up and spreads out as it grows. This setup works well when my garden is small.
If I want to grow two plants, I can place one squash at each end of the trellis. The vines will fill in both directions and I’ll get more squash from the same footprint. This is my best option when I have more space to work with.
I need about 3 feet between trellises to prevent crowding and keep air moving around the plants. I also want 3 feet of space at the base for walking and doing maintenance work.
I recommend using livestock panels or cattle panels for the trellis structure. These are sturdy enough to handle heavy fruit without sagging. They’re metal frames that come in standard sizes and hold up well over time.
When Trellising Isn’t Worth the Effort

Now that you know how to space and structure your trellis, I have to ask: is trellising actually right for my squash?
Here’s when I skip the trellis. Giant pumpkins over 20 pounds and huge hubbard squash need support systems so sturdy and costly that ground growing makes more sense. Bush varieties don’t sprawl much, so they don’t need vertical space. I also avoid late-season trellising because the risk of breaking established vines outweighs any benefit.
| Situation | Best Choice | Why |
|---|---|---|
| Large pumpkins (20+ lbs) | Ground | Support structures become too sturdy and costly |
| Bush squash | Ground | Vines stay compact naturally |
| Poor soil or weak irrigation | Ground | Plant roots need health more than spacing does |
| Late planting | Ground | Risk of breaking vines during setup |
I also think about my bed conditions before deciding. Poor soil and weak irrigation systems make trellising pointless. My plants need healthy roots first. When beds are crowded, trellising reduces air circulation and creates disease problems instead of preventing them. Sometimes I’m better off letting squash sprawl on the ground.